


Mailbutler news
Mailbutler Now Available in Microsoft AppSource
Mailbutler GmbH announces the availability of its flagship product, Mailbutler, in Microsoft AppSource, an online cloud marketplace.
Learn how to schedule emails in macOS Ventura + Sonoma and find out why Mailbutler’s Smart Send Later is better than Apple Mail's.
Irena is an experienced Content and Email Marketer who loves animals, slow mornings, and all things Tolkien.
If you’re an avid Mac enthusiast, chances are you’ve already heard the big news – Apple is releasing its nineteenth version of macOS this fall, called macOS Ventura.
As expected, macOS Ventura is packed with new features that make “the things you do most on Mac even better.” These include richer search results, Spotlight quick actions, Safari passkeys, shared tab groups, a redesigned Game Center dashboard, and, of course, numerous mail enhancements.
One of the key email improvements included in the macOS Ventura package is without a doubt the Scheduled send feature. But is it worth the wait or should you go with Mailbutler’s Smart Send Later option instead? Read on to find out.
Source: Apple.com
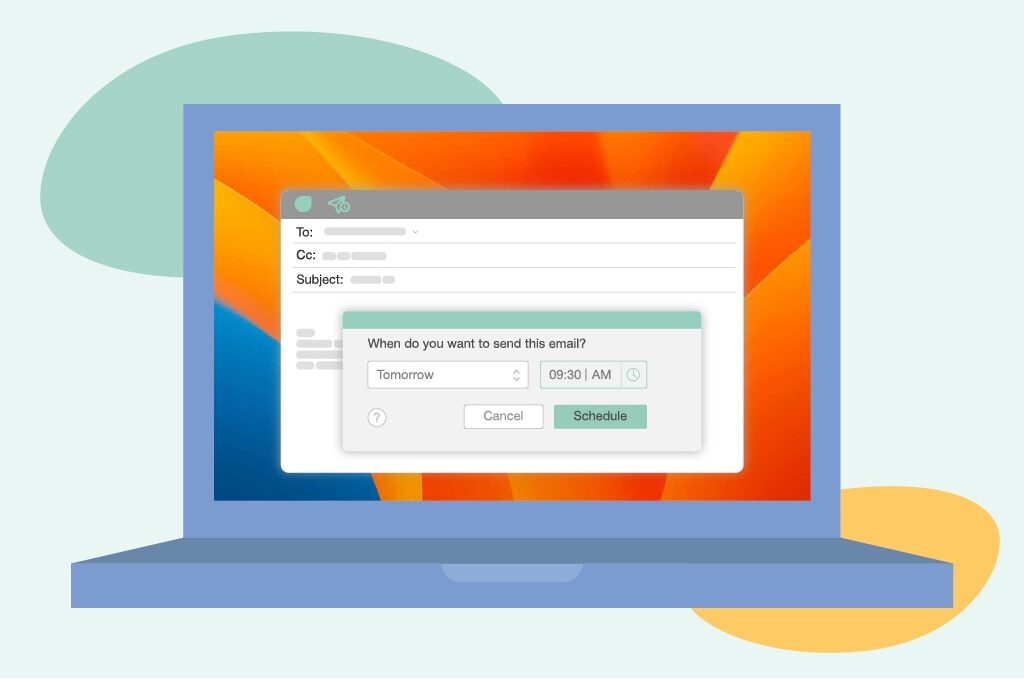
As the name suggests, Apple’s new Scheduled send feature allows you to schedule emails to be sent at a specific moment in the future.
The macOS Ventura email scheduling functionality gives you the freedom to compose messages whenever you want and send them later.
If you tend to work on your business emails late at night, this feature will help you avoid coming across as inconsiderate and unprofessional.
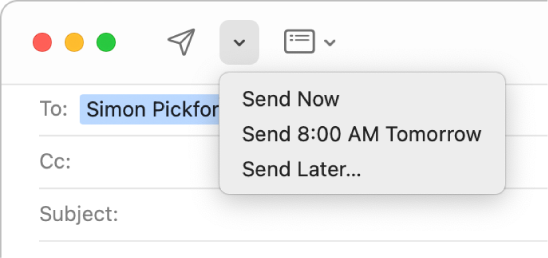
To schedule email sending in macOS Ventura, all you need to do is:
The macOS Ventura email scheduling feature allows for rescheduling. Plus, it delivers scheduled emails during your Mac’s “Power Nap” (while the computer is in sleep mode and connected to power).
However, the macOS Ventura email scheduling functionality doesn’t work when the Mail app is closed as well as when your computer is shut down or not connected to the internet.
To schedule email for later delivery in macOS Ventura with Mailbutler, first you need to download and install Mailbutler.
With Mailbutler integrated into your Apple Mail inbox, you’ll have access to a powerful collection of features, including Smart Send Later.
And the great news is that there’s a 14-day free trial, meaning you can try out all of Mailbutler’s premium features before committing to a paid plan.
Once Mailbutler is up and running, you’ll be able to schedule emails directly within your Apple Mail inbox.
Here are the four simple steps you need to follow to schedule mail in the Apple Mail app:
Unlike the macOS Ventura email scheduling functionality, Mailbutler’s Smart Send Later feature doesn’t require you to be online when the email delivery time comes. Your computer can be off and not connected to the internet and your message will still be delivered.
What’s more, Mailbutler’s innovative Recipient Optimized Scheduling option helps you boost your open rates and maximize your chances of getting a reply by recommending when to send your emails.
Mailbutler makes these suggestions based on the tracking data it collects for your contacts’ email addresses.
This feature is a must for anyone who uses email to communicate with colleagues and clients who live in different time zones or have different working hours.
But Mailbutler’s Smart Send Later feature does so much more. If you try to send an email outside of your own set working hours, it can automatically schedule your email to be sent at the beginning of your next working day. This means you always stay professional, and always send emails during the working hours of your recipient, maximizing your chances of having your email read, rather than lost in the daily barrage of emails.
Moreover, if you don’t want to send your message if your recipient has already emailed you, Mailbutler can automatically cancel the delivery of your scheduled email. This works even if you schedule an email to multiple recipients and just one of them replies. The message isn’t lost, though, meaning you can head into your scheduled folder and still make changes or reschedule your email to be delivered if you want.
Mailbutler also gives you push notifications letting you know about the status of your scheduled message, for example, if it gets automatically canceled or if its delivery was successful, and provides an informative widget in the Mailbutler Sidebar which gives you an overview of all your scheduled messages and their status.
Mailbutler’s Smart Send Later feature beats the macOS Ventura email scheduling functionality for five main reasons:
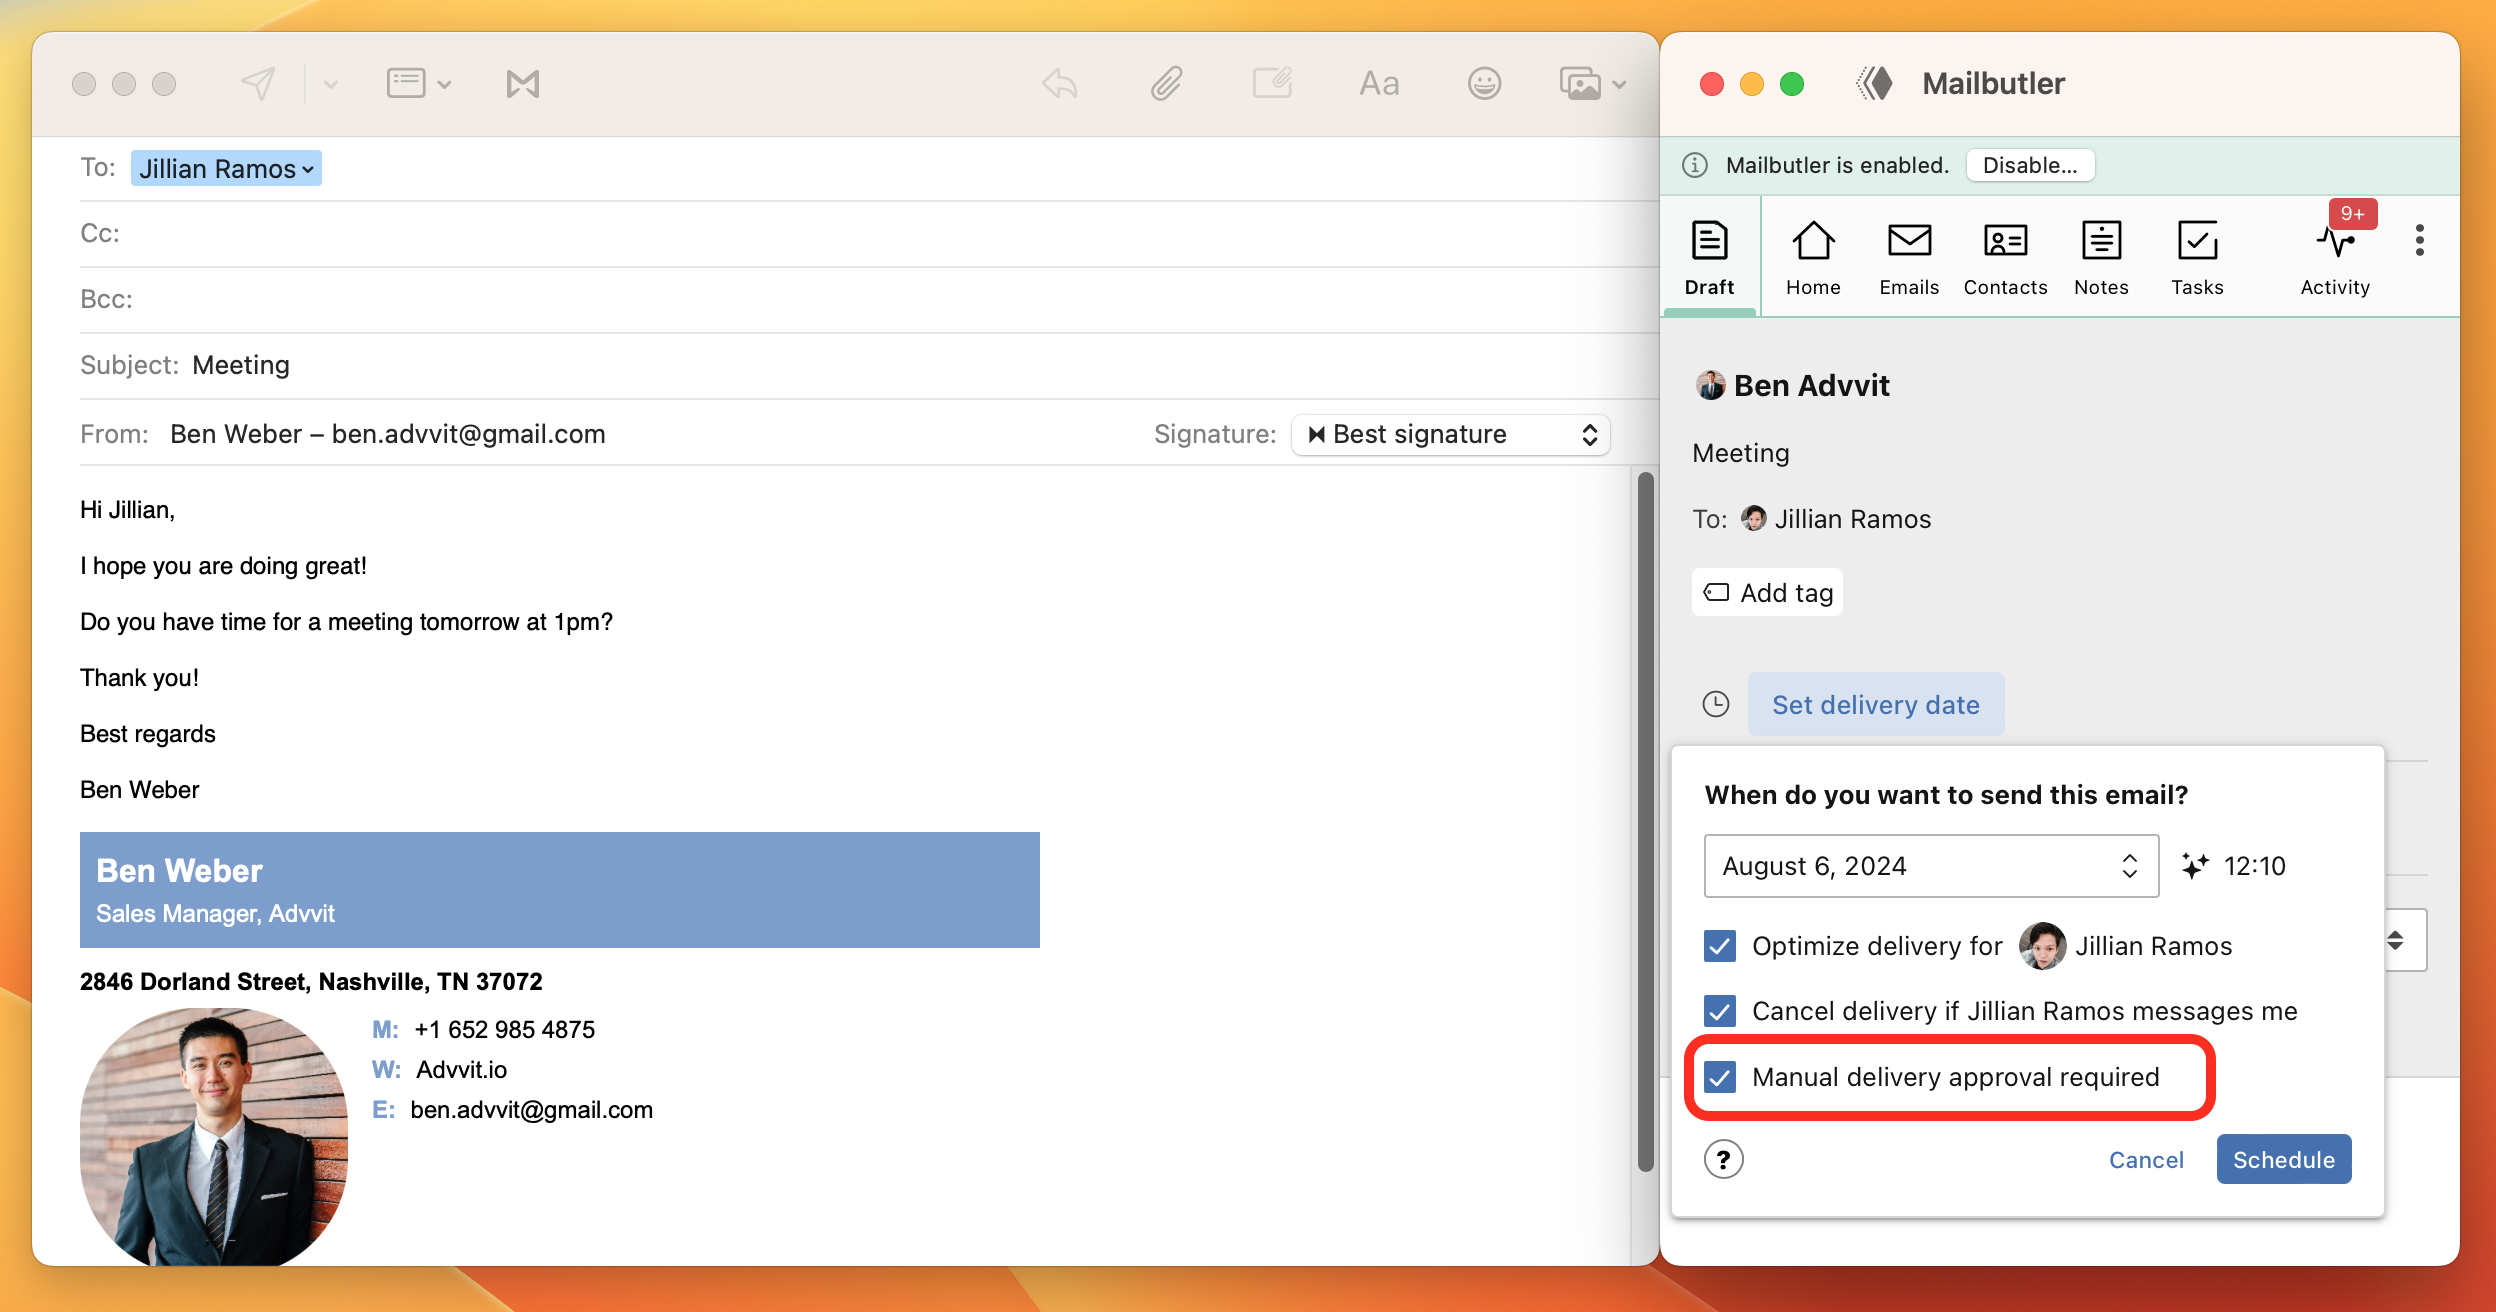
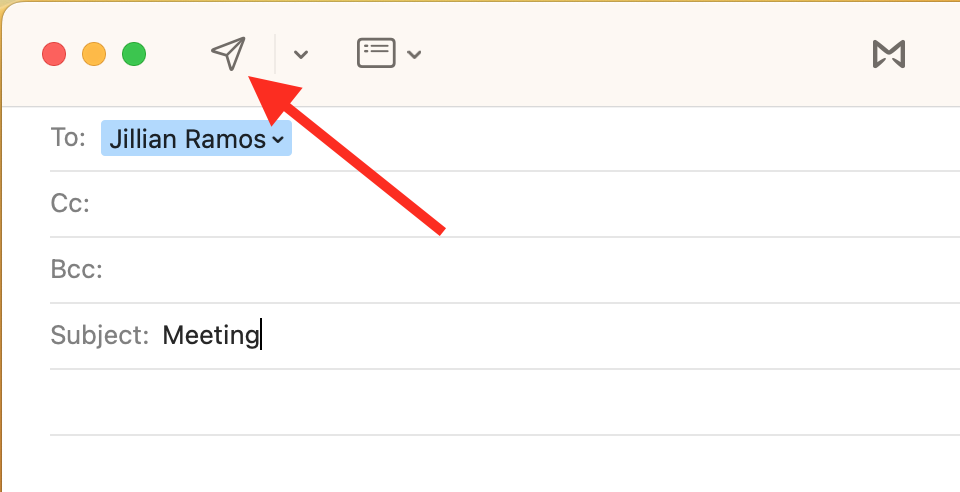
1. Open Apple Mail and compose a new email.
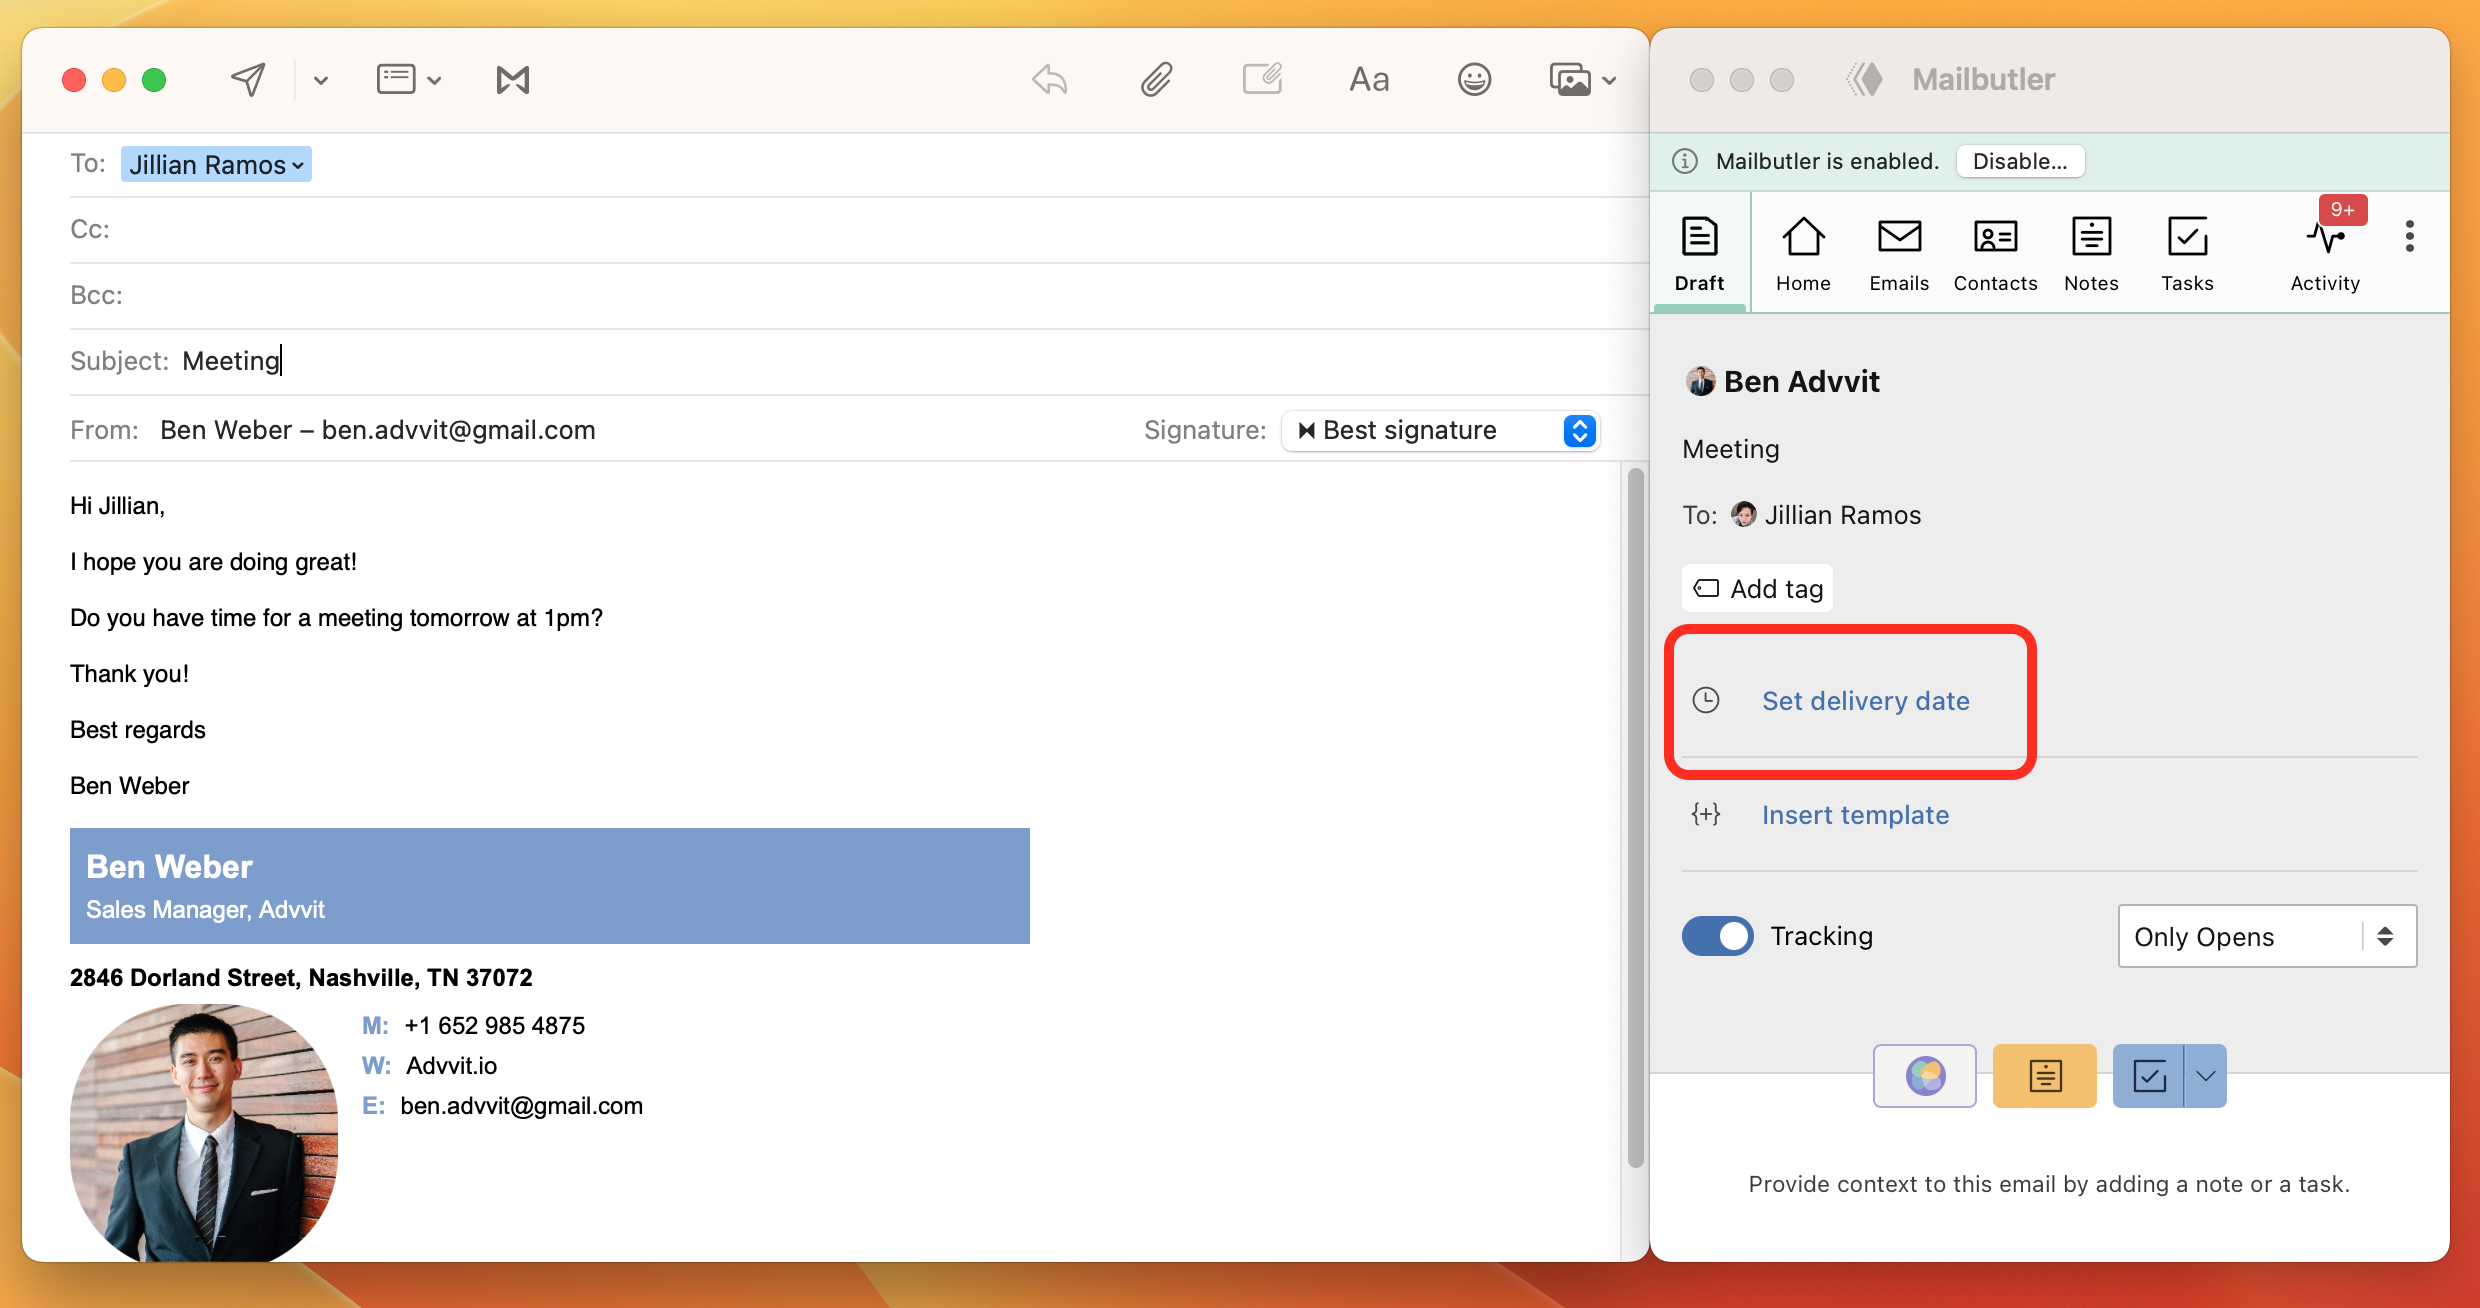
2. Open the Mailbutler sidebar by clicking on the Mailbutler icon.
3. Click Set delivery date.
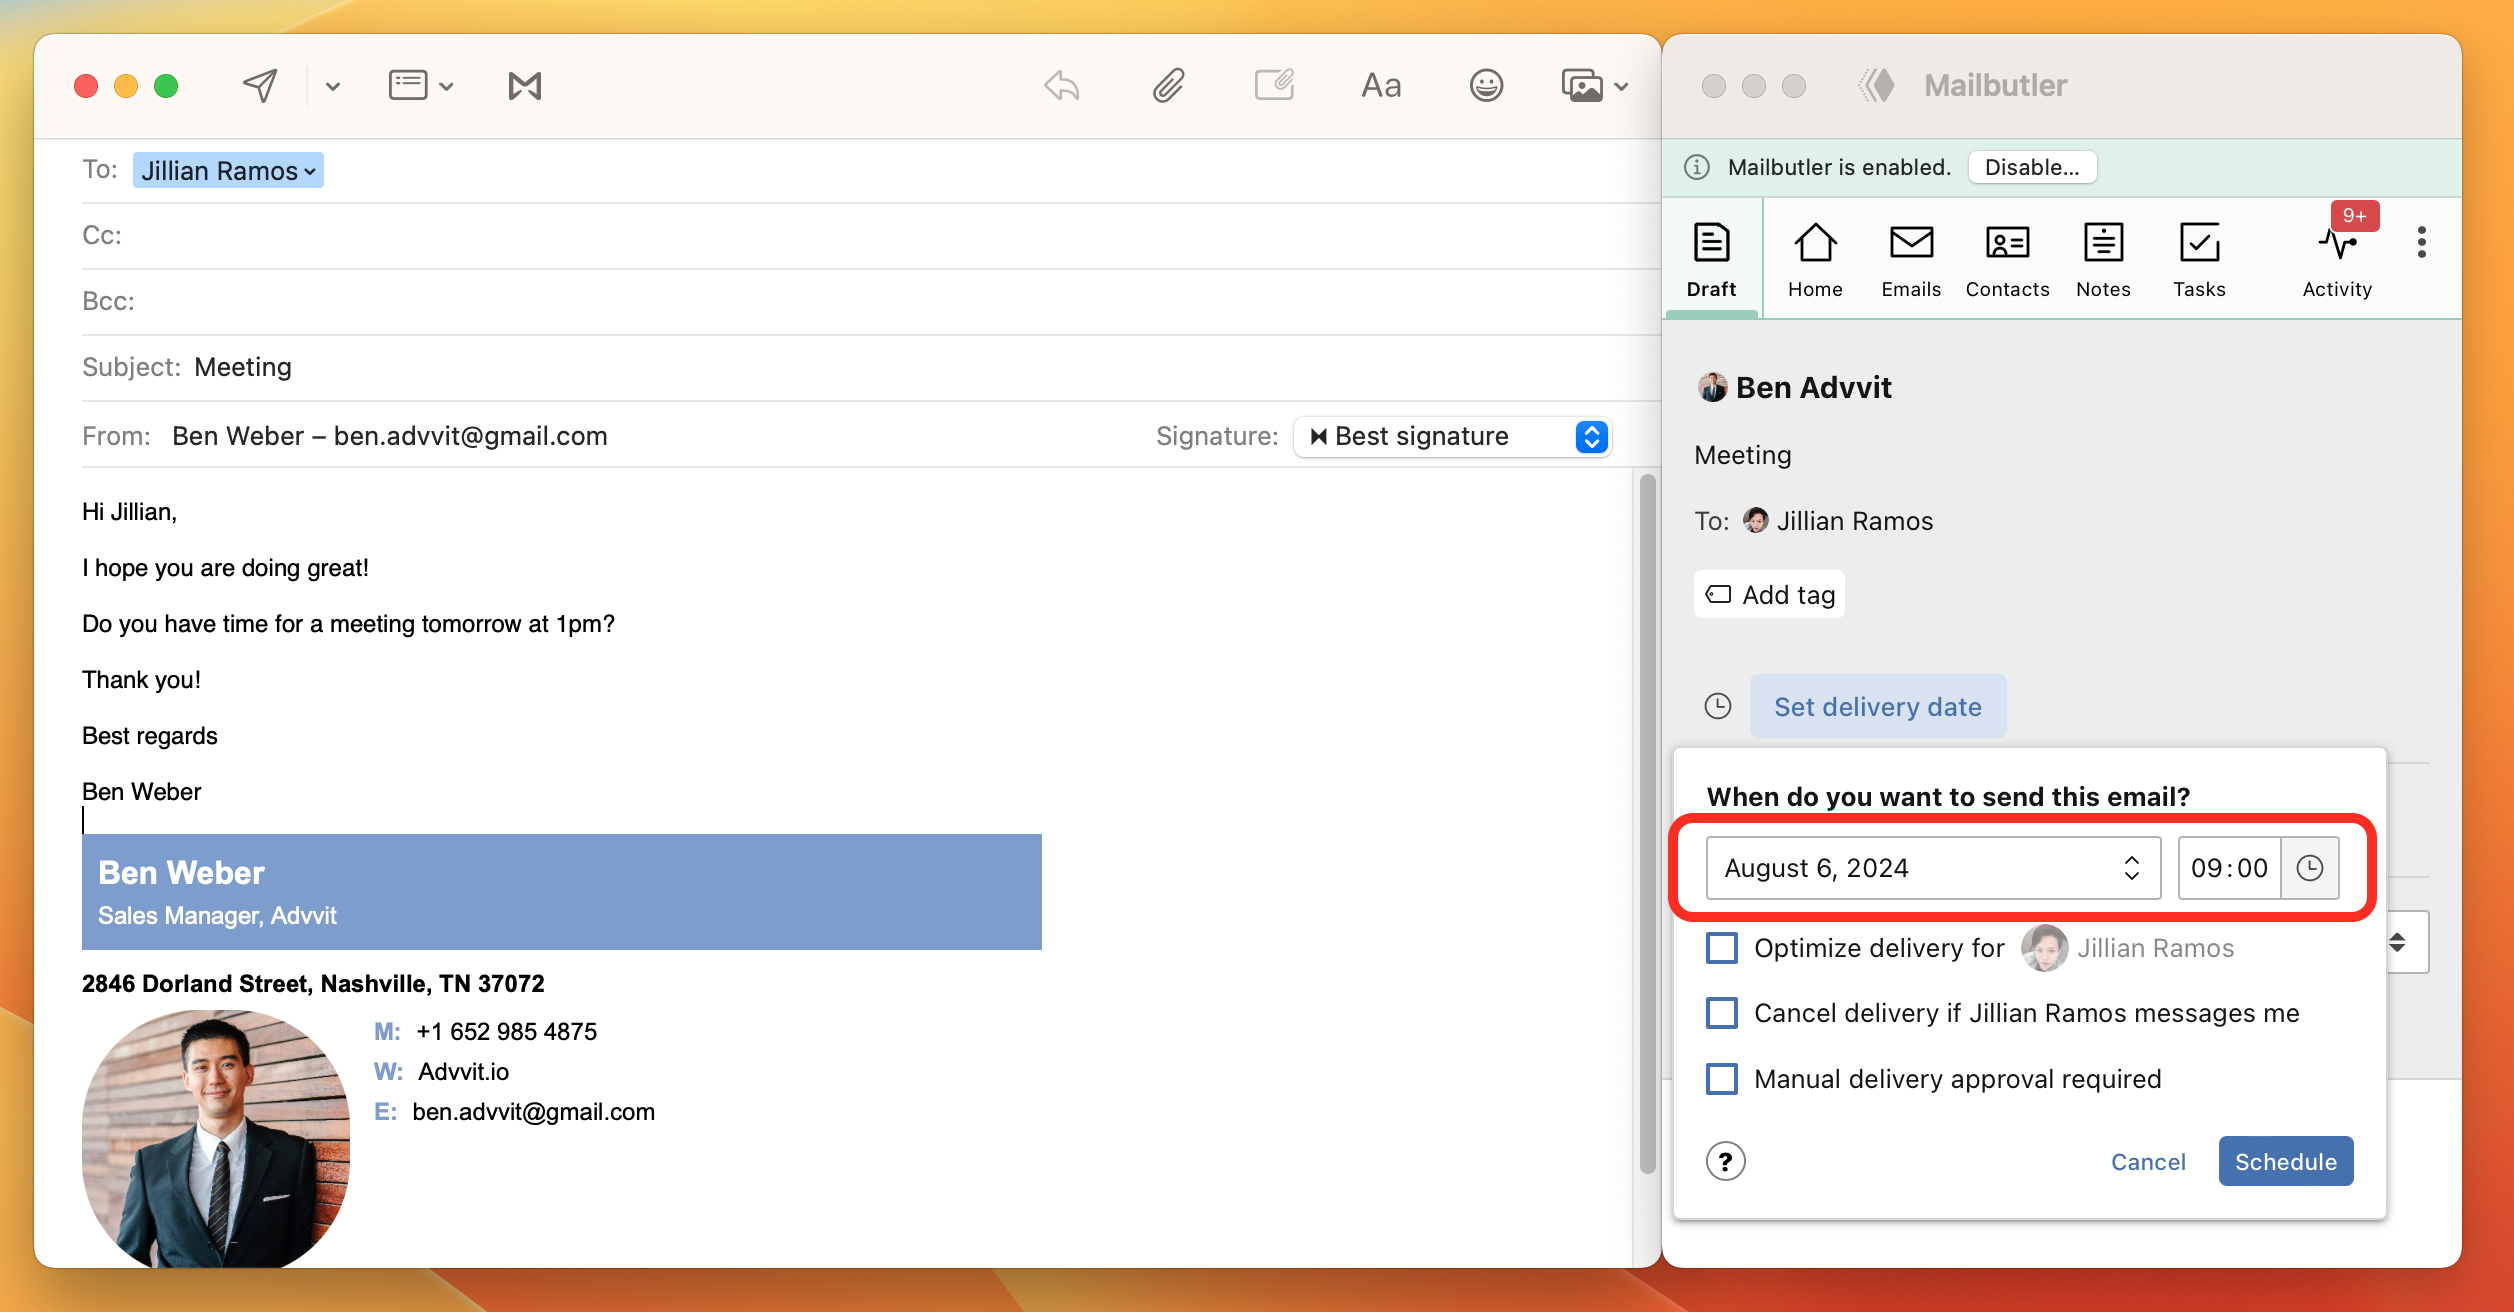
4. Set the desired date and time for sending your email. You can choose from predefined intervals or manually enter a specific date and time.
5. Alternatively, select "Optimize delivery for" if you prefer Mailbutler to automatically determine and schedule the best time for your email to reach the recipient.
6. Mark "Cancel delivery if [recipient] messages me" to have Mailbutler cancel the scheduled email if you receive a message from the recipient before it is sent.
7. Select "Manual delivery approval required" if you wish to personally confirm the dispatch of your scheduled email before it is sent.
8. If you've selected "Manual delivery approval required," you'll need to confirm the email's dispatch through the Smart Send Later widget. Without this approval, the email won't be sent. To approve, hover over the email, click the three dots that appear, and then select "Approve delivery."
9. Click Schedule.
10. Click Close Draft to finish scheduling your email.
11. Or click Continue Editing.
12. After selecting "Continue Editing," you must press Apple Mail's "Send" button once your edits are complete to finalize the scheduling of your email.
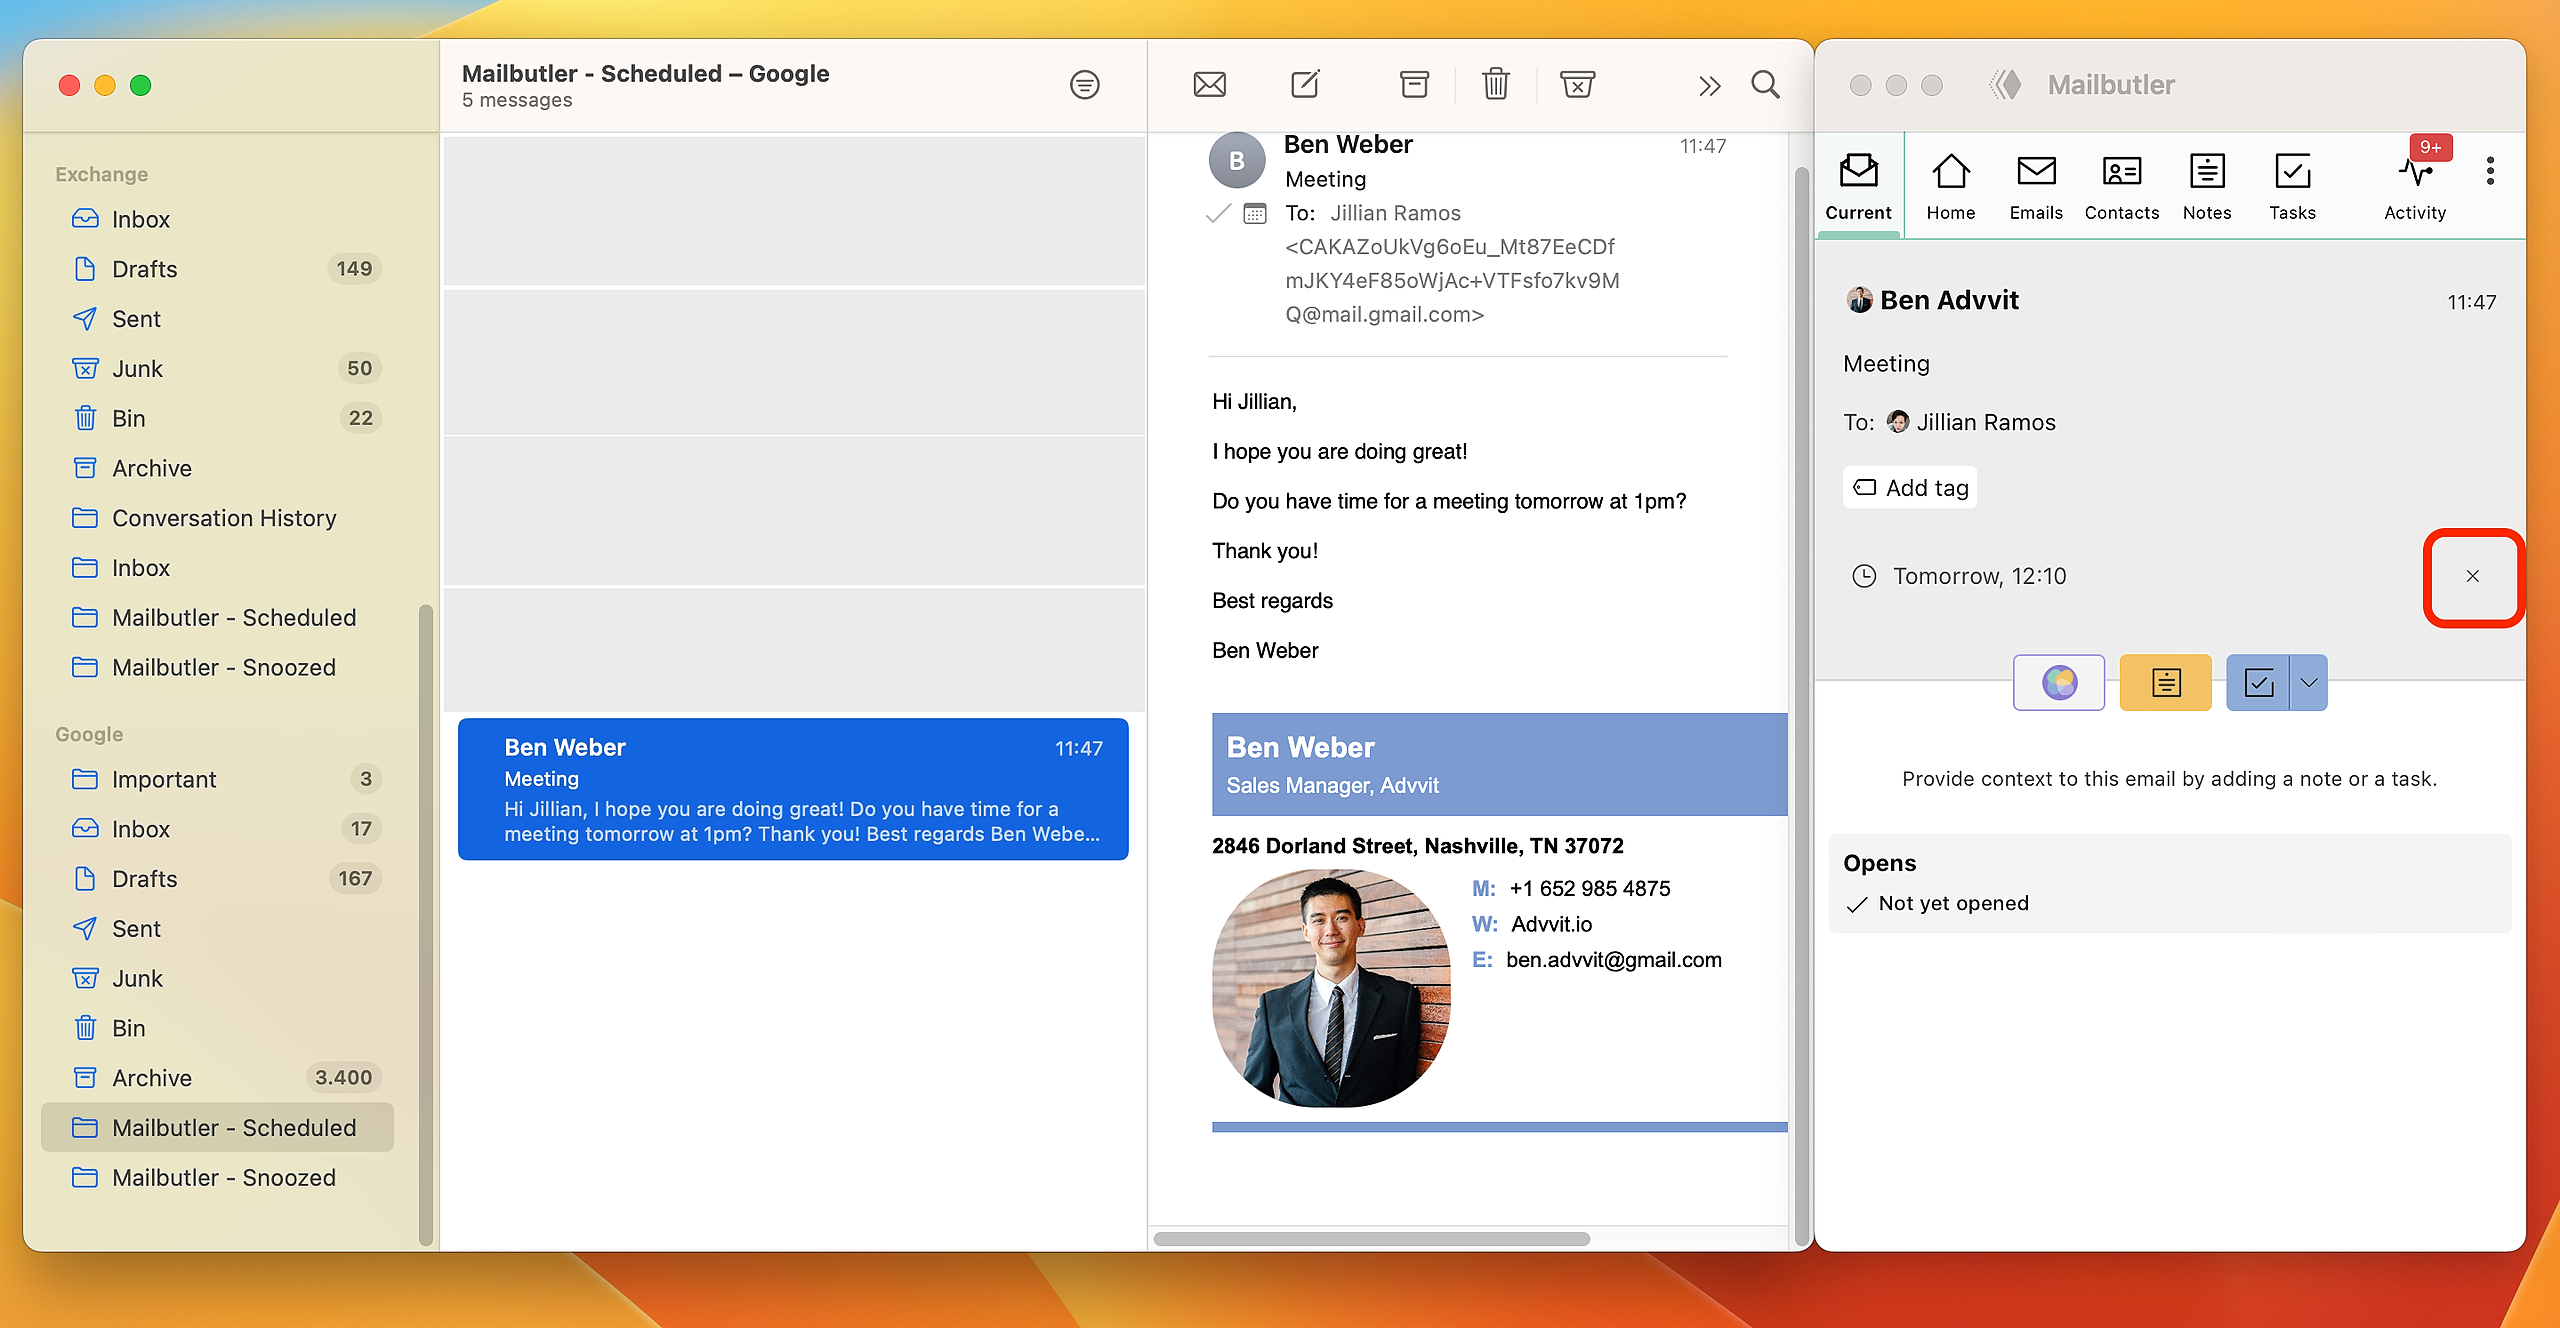
14. You can find all of your scheduled emails in the Mailbutler - Scheduled folder. And you can unschedule your emails from there.
15. To unschedule an email, click the x button in the Mailbutler sidebar.
Please note: The Smart Send Later feature should not be used to create email blasts or campaigns. Scheduling large batches of emails (more than 100) can result in a failure to send. This limit is due to most users’ servers, not because of Mailbutler.
Yes. Apple's Scheduled Send feature lets you plan emails to be sent at a specific time in the future. With the email scheduling feature in macOS Ventura, you can write your messages anytime and have them sent later. However, it's important to note that the macOS Ventura email scheduling only works when the Mail app is open and your computer is online.
This is where Mailbutler's Smart Send Later feature comes in very helpful. By installing Mailbutler, you can schedule emails right from within your Apple Mail inbox. With Mailbutler's Smart Send Later feature, you don't need to be online for the email to be delivered at the scheduled time. Whether your computer is off or not connected to the internet, your message will still be sent.
Here’s how to schedule an email in the Apple Mail app with the help of Mailbutler:
Scheduling emails in Outlook for Mac is easier than in its Windows version, thanks to the easy-to-navigate drop-down menu. Here's how to use it:
With Outlook for Mac, your scheduled email can still be found in the Drafts folder, allowing you to make any necessary changes. Additionally, unlike Outlook for Windows, Outlook for Mac can send your scheduled email at times when the app is not running on your device.
Mac users have plenty of reasons to look forward to the release of macOS Ventura later this year, but the email scheduling feature isn’t one of them.
Although useful and easy to use, Apple’s long-overdue Scheduled send functionality has numerous limitations.
The fact that your computer must be connected to the internet when the email delivery time arrives is its greatest downside.
Another significant weakness of the macOS Ventura email scheduling feature is the inability to view and edit scheduled messages on other devices.
Things are quite different with Mailbutler’s Smart Send Later functionality.
When you schedule an email in the Apple Mail app using Mailbutler, your work ends the moment you hit the schedule button.
You don’t have to worry about whether you’ll be online when the email delivery time comes because Mailbutler’s Smart Send Later feature does its work even when you’re not connected to the internet.
And having peace of mind and forgetting about work for a while is the whole point of scheduling emails to be sent later, isn’t it?


Mailbutler GmbH announces the availability of its flagship product, Mailbutler, in Microsoft AppSource, an online cloud marketplace.

Get the best practices on writing prompts for Mailbutler's Smart Assistant. Learn to communicate effectively with Maia.

Announcing the end of Shimo VPN. Keep in mind that all Shimo licenses will remain active and usable. Read more here.

Let our yellow and blue logo serve as a reminder that Ukraine is not alone in this battle, and that we are here to provide continuous support.

The Mailbutler team workshop improved our communication, collaboration, and understanding of one another. Check it out here.

The Smart Assistant is available to all users on our Smart plan (formerly Professional+ plan) and Business plan. Learn more here.