Your email signature is like the digital version of a business card. It's the final touch that can leave a lasting impression. Whether you're networking, closing deals, or just keeping in touch, a well-designed signature adds a touch of professionalism and personality to every email.
If you’re an Apple Mail user, setting up a stylish and effective email signature in Apple Mail is easier than you might think. This guide will walk you through the process step-by-step, ensuring your emails always end on a high note.
How to create an Apple Mail signature
Creating an email signature in Apple Mail is straightforward. Here's how:
- Open Apple Mail: Launch the app on your Mac.
- Go to Preferences: Click on "Mail" in the top-left corner, then select "Preferences."
- Select the Signatures Tab: In the Preferences window, click the "Signatures" tab.
- Add a New Signature: Click the plus (+) button to create a new signature.
- Enter Your Details: In the right column, enter your signature details. You can include text, images, and links.
- Choose Account: Drag the signature to the desired email account in the left pane.
- Set Default Signature: Use the "Choose Signature" pop-up menu to set your default signature for new emails and replies/forwards.

Additional Customization
- Edit Your Text: Click "Edit" in the menu bar to paste text, turn text into links, and check spelling and grammar.
- Format Your Text: Click "Format" in the menu bar to change the font and color, adjust text alignment, and add lists.
- Add an Image: Drag an image into the preview area.
By following these steps, you can create a personalized and professional email signature in Apple Mail. For more detailed instructions, visit the Apple Support page.
How to Add Signature in Apple Mail
You can set up a signature to be automatically added to your emails in Apple Mail. Here's how:
- Open Apple Mail: On your Mac, open the Mail app.
- Access Settings: Click on "Mail" in the top-left corner, then select "Settings."
- Go to Signatures: Click the "Signatures" tab.
- Select Account: Choose an account from the left column.
- Choose Signature: Use the "Choose Signature" pop-up menu to select a signature.
For multiple signatures, you can alternate between them randomly or sequentially. To disable the automatic signature, select "None" from the same menu.
Note: Signatures aren’t added to emails sent from a unique, random address created with Hide My Email.
Related: Professional email signature examples
How do I create an Apple Mail signature with Mailbutler?
Mailbutler makes it easy to create and customize email signatures for Apple Mail. With a few simple steps, you can add a professional touch to your emails. Here's how to do it:
- Open Mailbutler Sidebar: Click the sidebar icon in Apple Mail to open the Mailbutler Sidebar.
- Access Account Settings: In the Sidebar, click the Account Settings (⚙) button and select "Account & Preferences."

- Navigate to Signatures: In the new window, select "Signatures" under "Manage Features" on the left.
- Add a New Signature: Click the plus icon (+) to add a new signature.
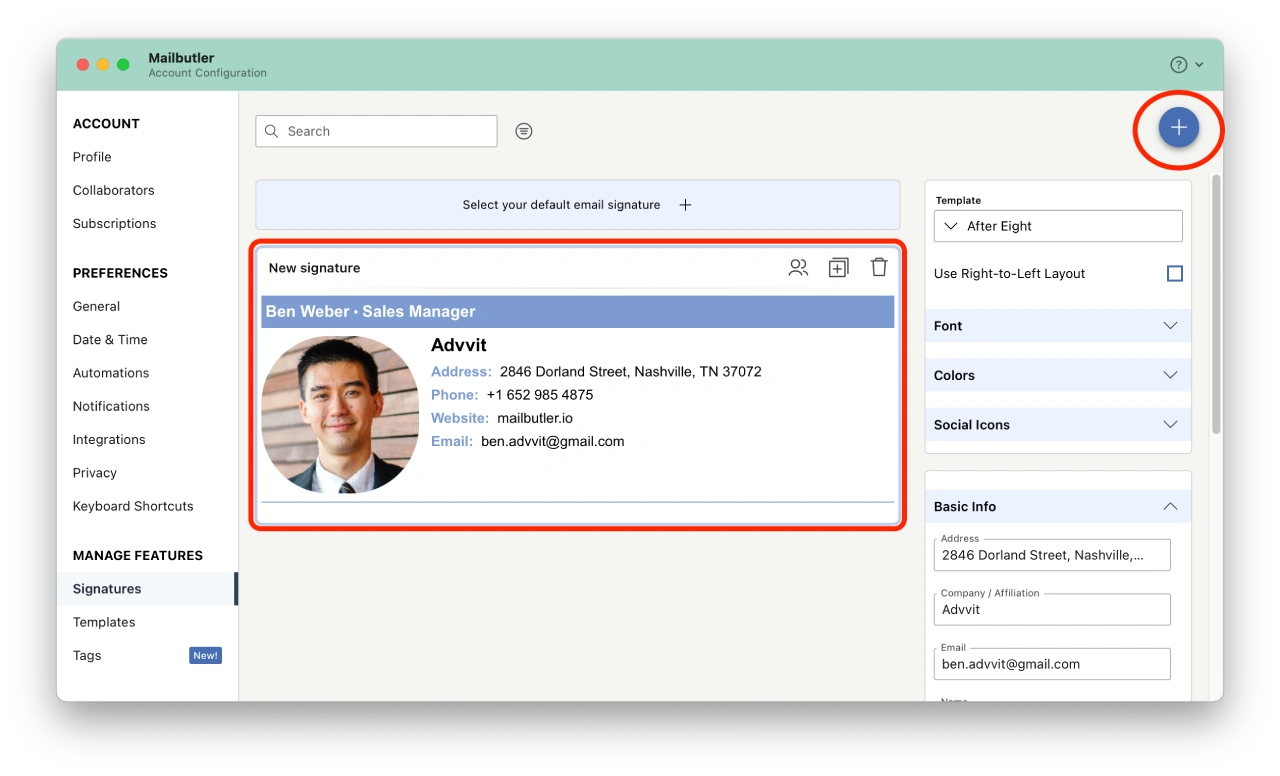
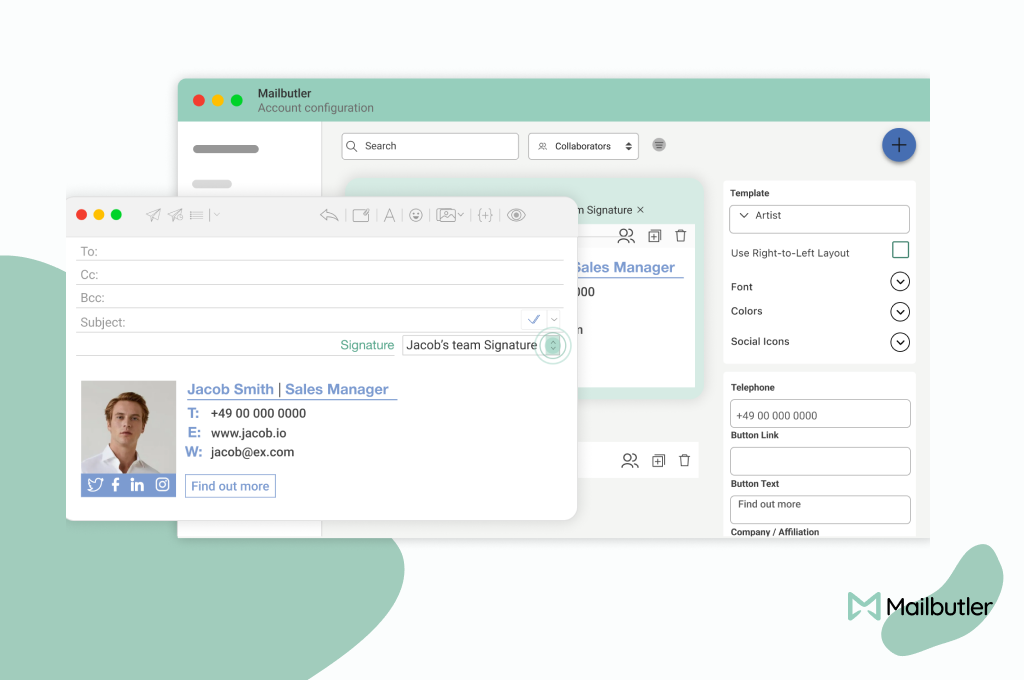
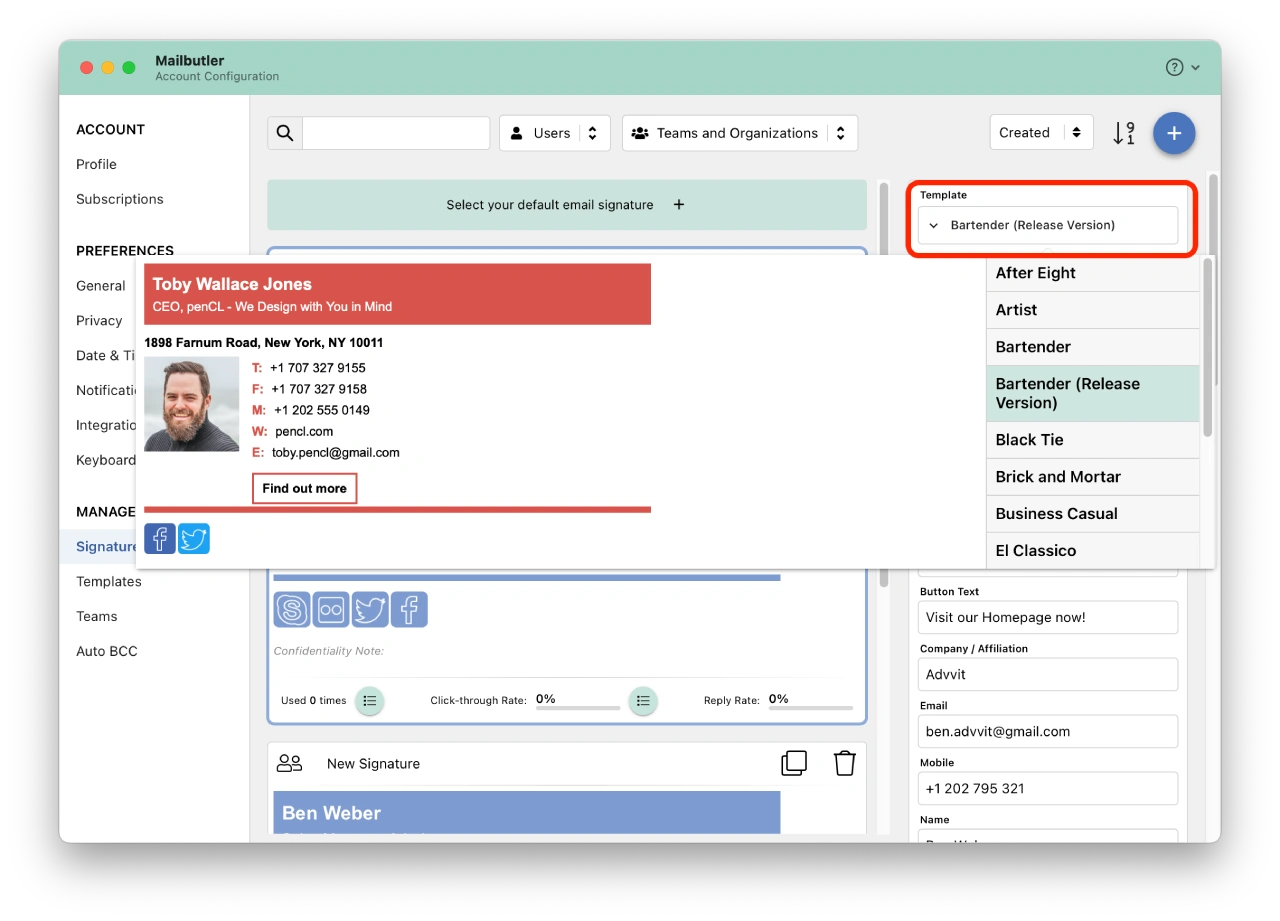
- Choose a Template: Select your preferred signature template from the dropdown menu.
- Customize Your Signature: Use the Signature editor to:
- Add a profile picture, company logo, or handwritten signature.
- Enter personal information.
- Include a call-to-action button.
- Change font and colors.
- Add social media links, images, or videos.
- Include a closing and disclaimer.
- Use a right-to-left layout for languages like Arabic or Hebrew.
For more details, visit the Mailbutler Help Page.
Similar post: Best email signature generators
How do I attach a Mailbutler Signature to my email?
- Compose a New Email: Open Apple Mail and start a new email.
- Select Your Signature: Click the signature dropdown button and choose the desired signature for your email.
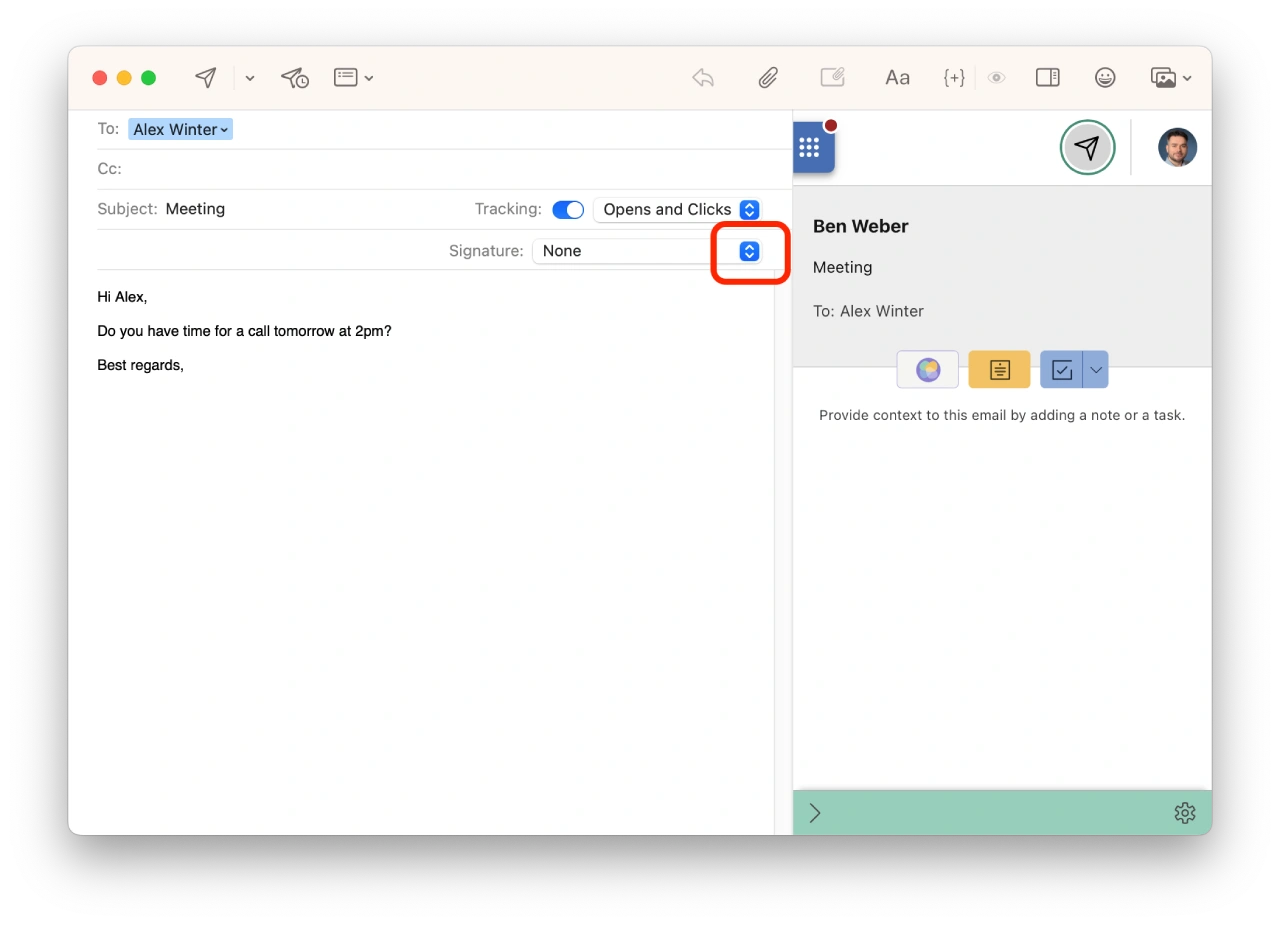
- Set Default Signature: To automatically add a signature, go to the Signatures tab in your Mailbutler account settings. Note that this default signature will override Apple Mail settings and apply to all email accounts in your email client.

Best practices for Apple Mail email signatures
A well-designed company email signature can enhance your professional image. Here are some tips:
- Keep it Simple and Professional: Avoid clutter; use clean and straightforward designs.
- Include Essential Contact Information: Ensure your name, job title, phone number, and email address are included.
- Use Consistent Branding: Align your signature with your company's branding by using logos, colors, and fonts consistently.
- Avoid Too Much Text or Large Images: Keep your signature concise and ensure images are appropriately sized to avoid long loading times.
By following these best practices, you can create an effective and professional email signature that reflects your company’s brand.
Related post: Email signatures guide
Summary
A professional email signature is a key part of effective communication. Whether using Apple Mail or tools like Mailbutler, creating and managing signatures can be straightforward and beneficial.
Following best practices ensures your signature remains simple, professional, and aligned with your company's branding. Setting up default signatures and customizing them as needed enhances your email's impact and maintains consistency across all your communications.
We’d love to hear your thoughts! Share your tips for creating effective email signatures in the comments. For more on productivity and email management, check out our related articles and explore Mailbutler’s features to improve your email workflow.